
ISO was originally used to describe the sensitivity of film, indicating its ability to gather light. A higher ISO rating meant that the film was more capable of capturing images in low-light conditions. This high ISO film, often referred to as “fast film,” required shorter exposure times compared to films with lower ISO ratings. In the digital photography era, ISO now pertains to the sensitivity or signal gain of the camera’s sensor.
When it comes to controlling exposure, ISO is one of the three key factors, along with the f-stop and shutter speed. In most situations, manually setting the f-stop and shutter speed or utilizing the camera’s automatic exposure controls (such as aperture- or shutter-priority modes) is sufficient. However, there are instances where a shallow depth-of-field and a wide lens opening, or a fast shutter speed, may not allow enough light to reach the sensor. Similarly, when photographing a concert performance, even with the widest lens opening and the slowest handheld shutter speed, the sensor may still not receive enough light. In such cases, increasing the ISO setting becomes the solution to boost the sensor’s sensitivity to light.
By raising the ISO, the camera’s sensor becomes more responsive to light, allowing for proper exposure in challenging lighting conditions. It enables photographers to achieve the desired combination of a shallow depth-of-field, fast shutter speed, and adequate light for the sensor. However, it’s important to note that increasing the ISO comes with a trade-off. Higher ISO settings can introduce digital noise or graininess into the image. Therefore, finding the right balance between ISO, aperture, and shutter speed is crucial to achieving optimal image quality while managing the available light effectively.
What ISO setting should you use?
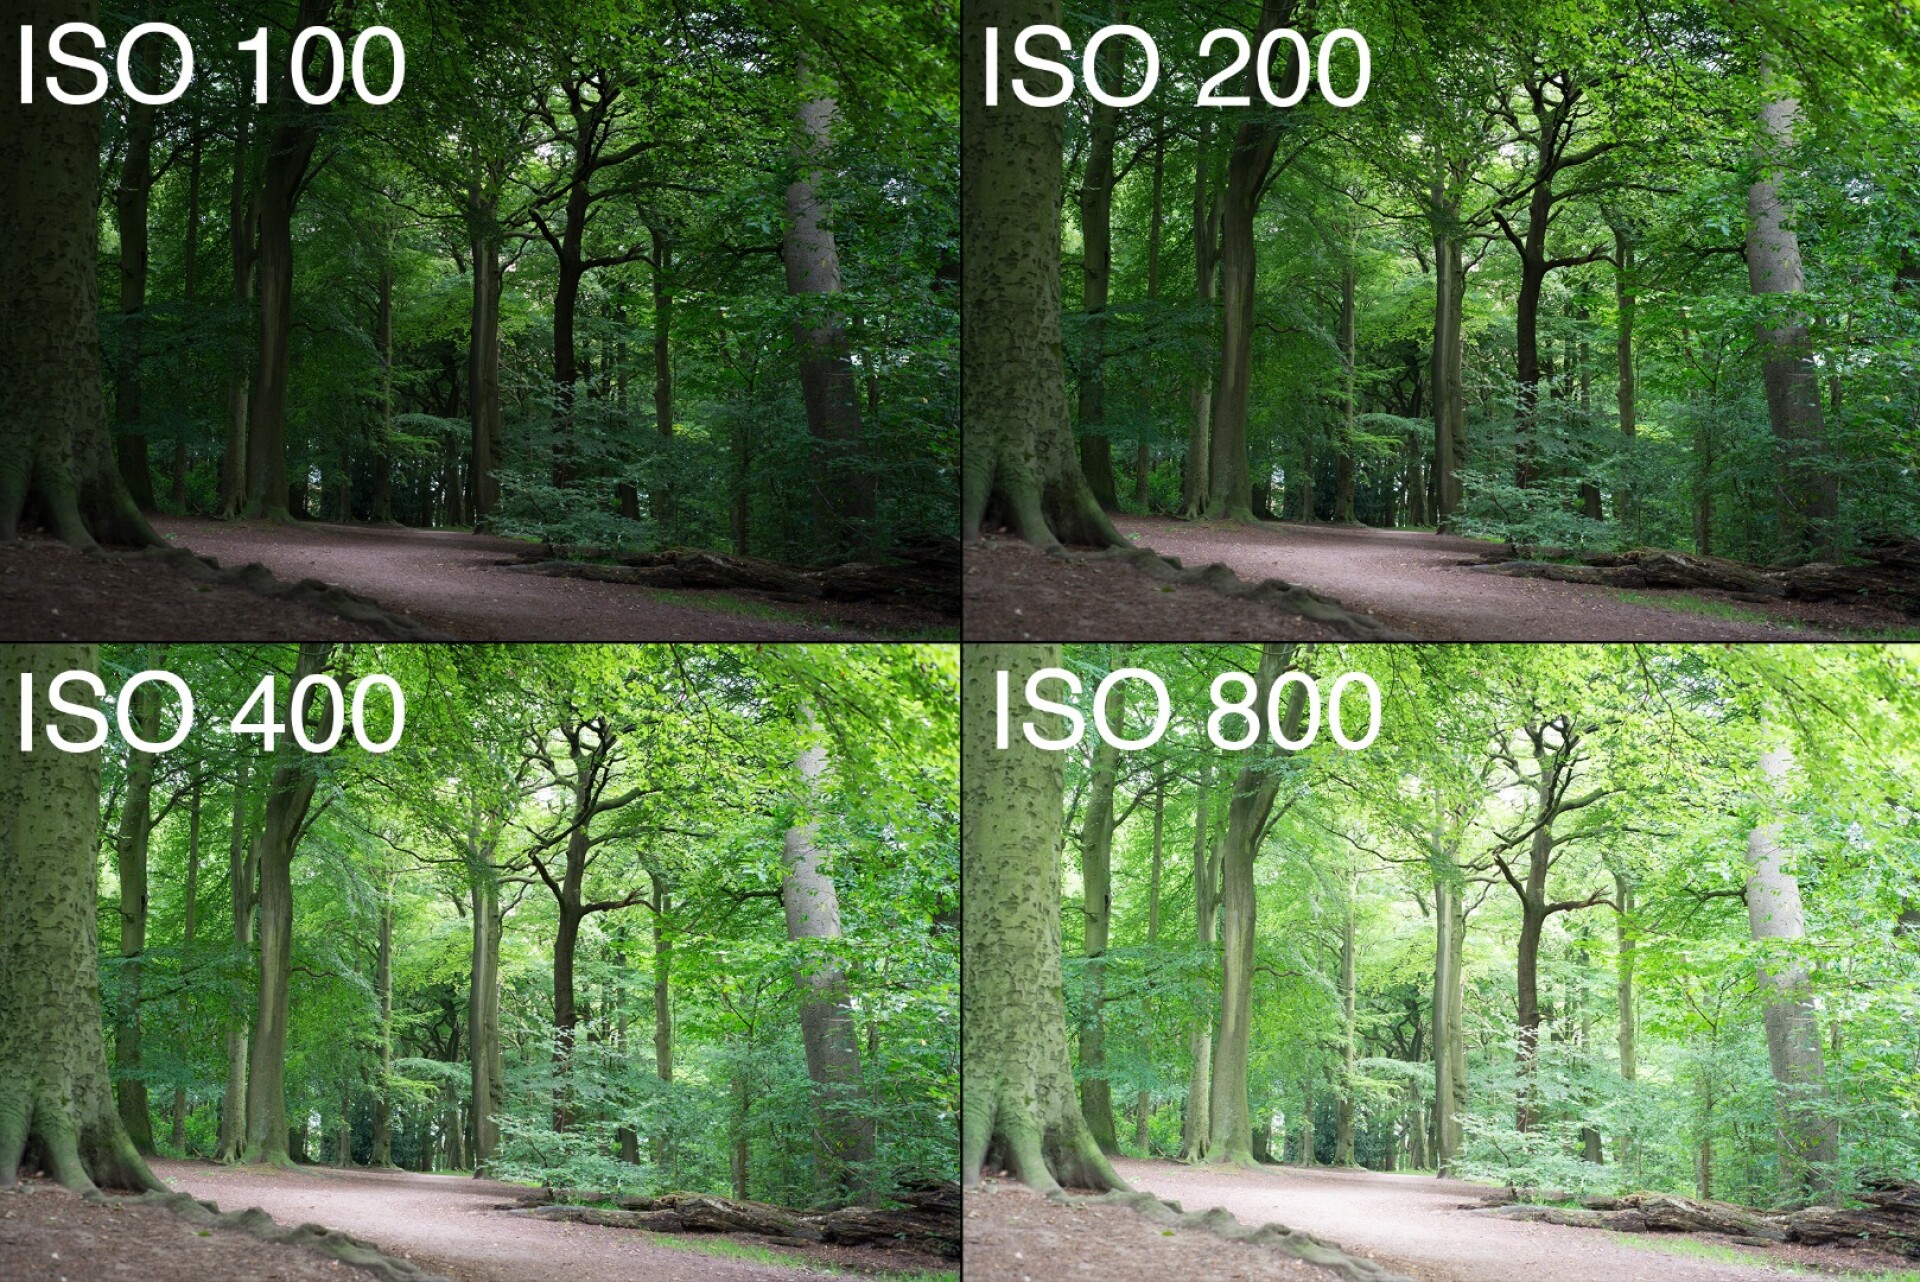
The choice of ISO setting depends on the lighting conditions and the desired outcome of your photographs. In general, it is advisable to use the lowest ISO possible to achieve cleaner images. When shooting in ample lighting conditions, you can typically use a low ISO setting such as ISO 100 or 200.
However, in more challenging lighting situations, such as low-light environments, you may need to increase the ISO to achieve a proper exposure. By raising the ISO, you allow your camera to gather more light, which results in a brighter image. This can be particularly useful when you need a faster shutter speed to prevent motion blur and capture sharp images.
Keep in mind that as you increase the ISO, the visibility of image noise becomes more prominent. Image noise manifests as a colored, grainy texture that can obscure details in your photos. To minimize noise, it is recommended to use the lowest ISO that still allows you to achieve a proper exposure. Modern cameras often handle higher ISO settings better, producing cleaner images with reduced noise. However, it’s important to strike a balance between ISO and image quality based on your specific camera’s capabilities.
ISO and Noise
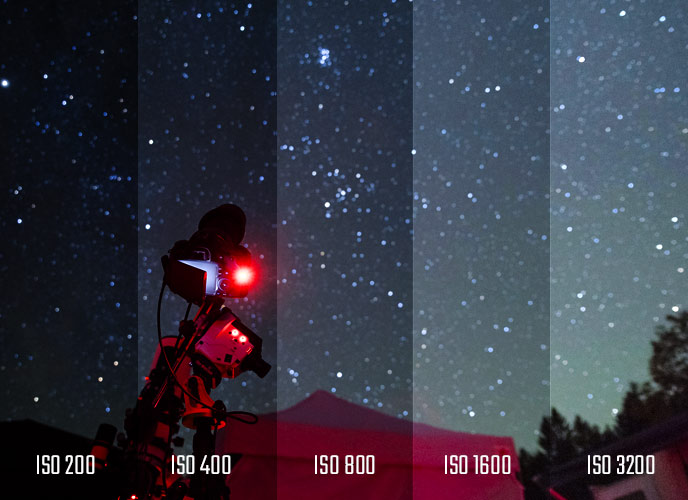
Image noise refers to the random fluctuations of brightness or color that can appear in digital images. It is often a result of electronic noise introduced by the image sensor and circuitry in digital cameras or scanners. In the case of film photography, grain can contribute to image noise, and shot noise can arise from the inherent nature of light detection.
Image noise is considered undesirable because it hinders the clarity and visibility of the intended information in an image. It can manifest as unwanted speckles, pixelation, or irregularities that distort the fine details and smoothness of the image.
In digital cameras, various factors can contribute to image noise, including the sensor’s size, the number of pixels, and the camera’s ISO sensitivity setting. Higher ISO settings are generally more prone to generating image noise due to increased amplification of the signal, which can introduce electronic noise into the image.

Low ISO
In situations where the lighting conditions are favorable, it is advisable to use a low ISO setting to minimize noise and achieve the highest quality image. The reason behind this is that higher ISO values can introduce noise, which becomes more apparent in darker or low-light environments. Noise manifests as a grainy texture in photos and can detract from the overall sharpness and clarity.
Firstly, shooting at low ISOs allows for an increased dynamic range in your images. This means that you can capture a wider spectrum of tones and colors, resulting in more vibrant and lifelike photos. The reduced sensitivity of the sensor at low ISOs allows for better preservation of subtle variations in light and shadow.
Additionally, selecting a low ISO setting contributes to greater sharpness and detail in your photographs. With less noise present in the image, the finer elements and textures are preserved more accurately. This leads to crisper edges, finer textures, and an overall enhanced level of detail that can significantly improve the visual impact of your photos.
Furthermore, using a low ISO helps to keep noise levels to a minimum. Noise, which appears as grainy artifacts or random variations in brightness and color, becomes more prominent as the ISO increases. By shooting at a low ISO, you effectively reduce the potential for noise, resulting in cleaner and smoother images with less distracting visual imperfections.
High ISO
In situations where light levels are low or when a fast shutter speed is required, utilizing a high ISO setting becomes advantageous. By increasing the ISO, the sensitivity of the camera’s sensor is heightened, allowing for shorter exposure times. This proves beneficial in low light scenarios as it minimizes the risk of blurriness caused by camera shake.
Fast shutter speeds are crucial for capturing action without motion blur, making high ISO particularly suitable for sports and wildlife photography. However, it is important to acknowledge the potential drawbacks of using high ISO. The increased sensitivity of the sensor can introduce graininess and noise into the image. Therefore, it is essential to experiment with different ISO settings to strike a balance that suits your preferences and maintains acceptable image quality.
Low light photography benefits from raising the ISO as it makes the camera more receptive to available light, resulting in brighter images. This proves helpful in situations where there is limited ambient light.
Furthermore, when shooting in low light conditions or using longer exposure times, increasing the ISO aids in reducing camera shake and achieving sharper images. The heightened sensitivity compensates for the lack of light, allowing for faster shutter speeds that minimize the impact of any unintentional camera movement.
If your goal is to capture action shots in low light environments, increasing the ISO is advantageous as it enables you to attain a faster shutter speed. This faster shutter speed effectively freezes the motion of your subject, ensuring that you capture crisp and sharp images even in challenging lighting conditions.
